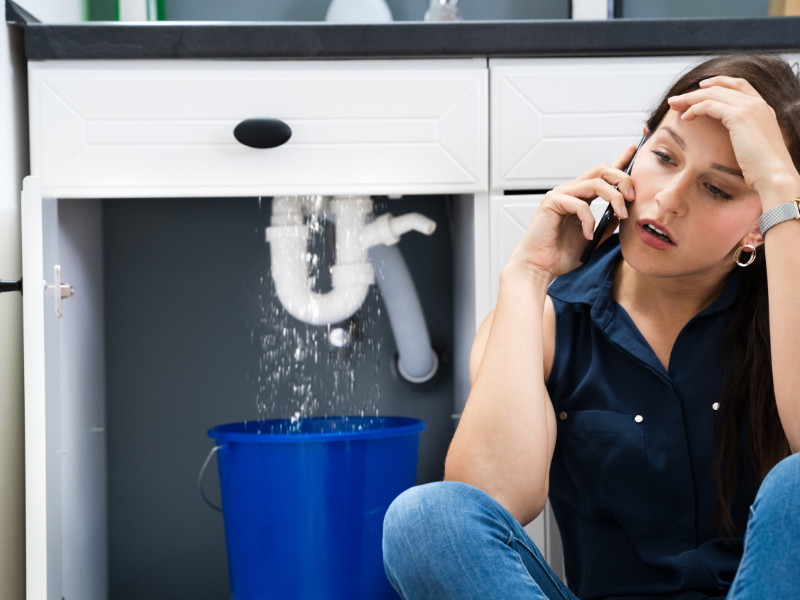
What to Do If Your Water Heater Is Leaking

A leaking water heater is one of those home issues that can start small—and escalate quickly. Whether you notice a slow drip, a damp floor around the base of the tank, or a growing puddle, a leak should never be ignored. Even minor water heater leaks can lead to costly water damage, mold growth, and loss of hot water when you need it most.

At Rocket Plumbing, we understand how stressful it can be to face plumbing issues unexpectedly. That’s why we’ve put together this complete guide to help you understand what to do if your water heater is leaking, step by step.

Step 1: Confirm the Source of the Leak

Before jumping to conclusions, it’s important to determine whether the leak is actually coming from your water heater.

Sometimes what appears to be a water heater leak may actually be condensation, water from a nearby appliance, or a loose pipe overhead.

Here’s what to check:

  • Condensation: If your basement or utility room is humid, condensation can form on the outside of the tank. This is harmless, but can be mistaken for a leak.
  • Nearby Pipes or Appliances: Check for leaks in overhead pipes, nearby washing machines, or HVAC systems that could be dripping water close to the tank.
  • Drips from fittings: Inspect the supply lines, T&P valve (temperature and pressure relief valve), and drain valve for moisture.

If the tank or a component connected to it is definitely leaking, it’s time to act fast.

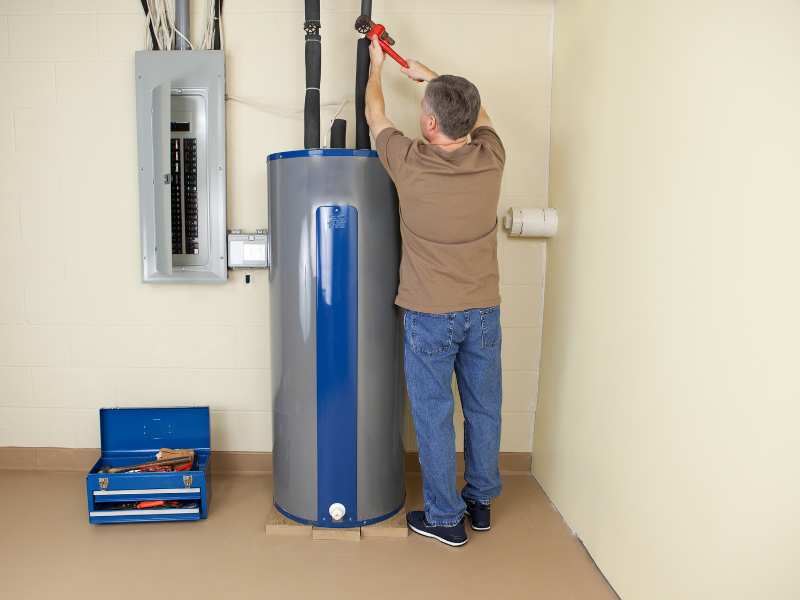
Step 2: Turn Off the Power Supply

Safety should always come first when dealing with a leaking appliance that uses electricity or gas.

If you have an electric water heater:

  • Locate your home’s electrical panel.
  • Find the breaker labeled for the water heater.
  • Flip the breaker to the OFF position to eliminate the risk of electrical shock.

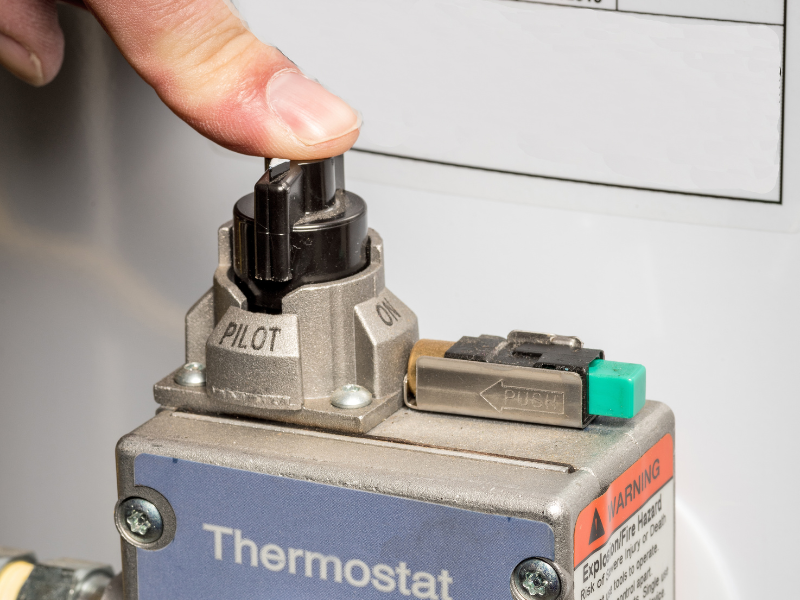
If you have a gas water heater:

  • Locate the gas shut-off valve near the base of the unit.
  • Turn the valve clockwise to the OFF position.

Turning off the power not only keeps you safe, but it also prevents the unit from continuing to heat water while leaking.

Step 3: Shut Off the Water Supply to the Heater

Now that power is off, prevent additional water from entering the tank by shutting off the cold water supply.

  • Look for the cold water shut-off valve above the unit—it may be a lever or wheel.
  • Turn it clockwise (right) until it stops.

If the valve is stuck or you can’t reach it safely, go to your home’s main water shut-off valve and turn it off from there.

This step helps minimize water damage and stops the leak from getting worse.

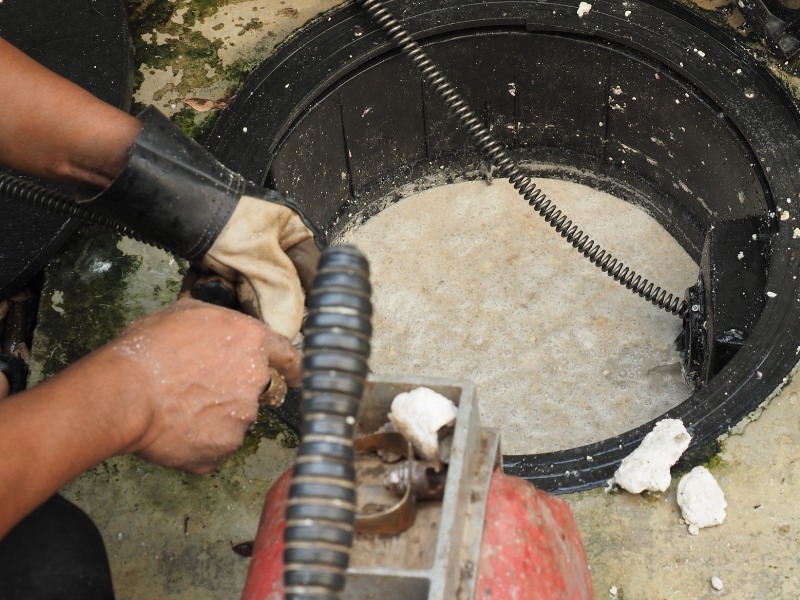
Step 4: Drain the Tank (If Necessary and Safe)

If the leak is more than a small drip, draining the tank can help prevent flooding or further damage to your flooring.

How to drain your water heater:

  1. Connect a garden hose to the drain valve at the bottom of the tank.
  2. Place the other end of the hose in a floor drain, sump pit, or outside where water can safely drain.
  3. Open the drain valve slowly to allow water to flow out.
  4. You may need to open a nearby hot water faucet to let air into the system and help the water flow freely.

Warning: The water inside the tank may be hot. Wear protective gloves and proceed with caution.

If you’re unsure about draining the tank yourself, wait for a professional from Rocket Plumbing to handle it safely.

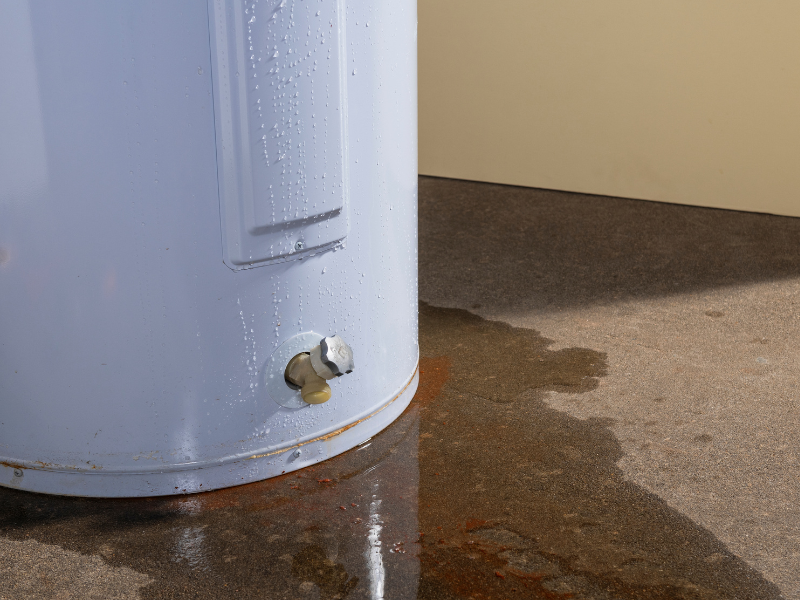
Step 5: Identify the Source and Type of Leak

Knowing where the leak is coming from will help you and your plumber determine whether it can be repaired—or if it’s time for a replacement.

Common types of water heater leaks:

  • Leaking from the top: This could be due to a loose or corroded inlet or outlet pipe, a faulty valve, or a leaking T&P valve.
  • Leaking from the bottom: If water is coming from underneath, it may indicate internal tank failure—often due to corrosion. In most cases, this means the unit needs to be replaced.
  • Leaking from the side: The T&P valve (on the side of the tank) may be discharging excess pressure or temperature. This can be caused by high water pressure, overheating, or a malfunctioning valve.
  • Leaking from the drain valve: A faulty or worn-out drain valve may slowly leak over time. Replacing the valve is usually a straightforward fix.

A professional plumber can perform a full inspection to diagnose the issue and recommend the best solution.

Step 6: Call Rocket Plumbing for Expert Help

Even if the leak seems minor, it’s important to get it checked by a licensed professional. A small leak can quickly become a major issue if left untreated. Our expert plumbers at Rocket Plumbing can:

  • Identify the source of the leak with precision
  • Repair or replace valves, fittings, and other components
  • Assess whether the tank is repairable or if replacement is the safer option
  • Provide energy-efficient water heater replacement options if needed
  • Ensure your plumbing system is safe, up to code, and leak-free

What Causes Water Heater Leaks?

Understanding the root cause of your leak can help you prevent similar problems in the future.

Common causes include:

  • Corrosion of the internal tank (especially in older units)
  • Loose fittings or aging valves
  • Excessive water pressure
  • Sediment buildup that cracks the tank lining
  • Thermal expansion from overheating
  • Poor installation or lack of maintenance

How to Prevent Water Heater Leaks in the Future

Prevention is key to avoiding another leak or full-blown plumbing emergency down the line. Here are a few maintenance tips to protect your water heater:

  • Flush the tank annually to remove sediment buildup
  • Inspect the anode rod every 2–3 years and replace it if worn
  • Check for moisture or rust around valves and fittings regularly
  • Schedule professional inspections with Rocket Plumbing each year
  • Replace the unit before it reaches the end of its lifespan (8–12 years on average)

Investing a little time in maintenance now can save you from a costly leak or water heater failure later.

Need Water Heater Repair in Charlotte? Call Rocket Plumbing Today

Whether you’re dealing with a slow leak or a full-blown water heater emergency, Rocket Plumbing is here to help. Our licensed plumbers arrive fast, provide honest assessments, and deliver expert repairs or replacements—so you can get back to hot showers and peace of mind.

Don’t wait until it’s too late. Contact us now for fast, reliable water heater service.

Emergency Plumbing: What to Do When Disaster Strikes

When a plumbing emergency strikes, panic often sets in. Water is gushing, your home is at risk of damage, and you need a solution fast. The key to minimizing destruction and stress is knowing what to do in those crucial first moments before a professional arrives. At Rocket Plumbing, we’re here to guide you through the steps to take during a plumbing emergency and provide fast, reliable service when you need it most.

Common Plumbing Emergencies and How to Respond

Plumbing emergencies come in many forms, and understanding the most common ones can help you react swiftly and effectively. Here are some of the most frequent issues homeowners face:

Burst Pipes

 A burst pipe can release gallons of water in a short amount of time, leading to extensive property damage. The moment you notice a pipe has burst, turn off your home’s main water supply to prevent further flooding. Next, drain the remaining water from your pipes by turning on cold water taps and flushing toilets. If possible, locate the burst pipe and wrap it with a towel to minimize leakage until a professional plumber arrives.

Overflowing Toilets

An overflowing toilet is one of the most stressful plumbing emergencies, especially if it happens unexpectedly. First, locate the shut-off valve behind the toilet and turn it off. If the water is still rising, remove the lid from the tank and manually push the flapper down to stop the water flow. Plunging the toilet might help clear the clog, but if the problem persists, it’s time to call Rocket Plumbing for assistance.

Water Heater Failure

If your water heater is leaking or making loud noises, it could indicate a serious problem. A complete failure can leave you without hot water or, worse, result in flooding. Shut off the water supply to the heater and turn off the power to avoid further issues. If you suspect a gas leak, evacuate immediately and call your utility company before contacting a plumber.

Clogged Drains and Sewer Backups

A slow drain may not seem like an emergency, but if multiple drains in your home back up at once, it could indicate a sewer line blockage. Avoid using harsh chemical drain cleaners, as they can cause pipe damage. Instead, try a plunger or a drain snake. If water is coming up through your drains or you notice a foul odor, call an emergency plumber right away.

Leaky Faucets or Pipes

A dripping faucet might seem minor, but over time, it can waste gallons of water and increase your water bill. If a pipe under your sink is leaking, place a bucket underneath to catch the water and tighten the fittings if possible. However, for persistent leaks, professional intervention is necessary.

Frozen Pipes

During colder months, frozen pipes are a common issue that can lead to bursting. If you suspect a pipe is frozen, open the faucet slightly and use a hairdryer to gently warm the pipe. Never use an open flame, as it can damage the pipes. If a pipe has already burst, turn off the main water supply and call Rocket Plumbing immediately.

Step-by-Step Guide to Handling Plumbing Emergencies

When faced with a plumbing disaster, follow these steps to reduce damage and restore order:

Step 1: Shut Off the Water Supply

Stopping the flow of water is the most important step in controlling a plumbing emergency. Locate the shut-off valve nearest to the problem area, or if necessary, shut off the main water valve for the entire home.

Step 2: Identify the Problem

Assess the situation carefully. Is it a major leak, a backed-up drain, or a water heater issue? Knowing the nature of the problem will help you decide whether it’s something you can temporarily manage or if immediate professional help is required.

Step 3: Take Temporary Measures

For minor leaks, use towels, buckets, or plumber’s tape to contain the damage. If dealing with an overflowing toilet, turn off the water supply and attempt to unclog it with a plunger. For frozen pipes, try gentle heat application to thaw them safely.

Step 4: Protect Your Home

Move furniture, electronics, and valuables away from the affected area to prevent further damage. If water has already seeped into carpets or flooring, use towels and a wet vacuum to clean up excess moisture.

Step 5: Call a Professional Plumber

Some plumbing emergencies require expert intervention. If you’re unable to stop the issue, call Rocket Plumbing immediately for 24/7 emergency services. Our experienced team will respond quickly to resolve the problem and prevent further damage to your home.

Step 6: Document the Damage

If your plumbing emergency results in significant water damage, take pictures and make notes for insurance purposes. Many homeowners’ insurance policies cover sudden water damage, so be sure to report the incident promptly.

Step 7: Prevent Future Plumbing Disasters

Once the emergency is under control, consider scheduling regular plumbing maintenance. Simple steps like insulating pipes, replacing old fixtures, and having periodic drain cleanings can prevent future problems.

Why Choose Rocket Plumbing for Emergency Repairs?

At Rocket Plumbing, we understand that plumbing emergencies can happen at any time. That’s why we offer 24/7 emergency services, ensuring that help is always available when you need it most. Our team of licensed and insured plumbers is equipped to handle a wide range of plumbing issues, from burst pipes to sewer backups and everything in between.

Our Commitment to Excellence:

  • Rapid response times to prevent further damage
  • Fully licensed and experienced professionals
  • Advanced tools and techniques for efficient repairs
  • Honest, upfront pricing with no hidden fees
  • Long-term solutions to prevent recurring problems

No matter the size or severity of your plumbing emergency, Rocket Plumbing is here to restore peace of mind and get your plumbing system back in working order.

Don’t Wait – Call Rocket Plumbing Now!

If you’re facing a plumbing crisis, don’t wait for the damage to worsen. Contact Rocket Plumbing for fast, reliable emergency plumbing services.

Your home deserves the best – trust Rocket Plumbing to handle all your emergency plumbing needs with speed and efficiency!

How to Tell If Your Sewer Line Is Clogged – Warning Signs & Solutions

A clogged sewer line is one of the most serious plumbing issues a homeowner can face. When your main sewer line is blocked, wastewater has nowhere to go, which can lead to slow drains, foul odors, and even raw sewage backing up into your home. If left unaddressed, a clog can cause extensive damage to your plumbing system, leading to costly repairs and potential health hazards.

Understanding the warning signs of a sewer line clog and knowing what steps to take can help you avoid major plumbing disasters. In this guide, we’ll cover everything you need to know about sewer line clogs, including common causes, how to fix them, and preventative measures to keep your plumbing system running smoothly.

What is a Sewer Line and Why is It Important?

Your home’s sewer line is the main pipe that carries wastewater from your sinks, toilets, and drains to the municipal sewer system or your septic tank. Unlike smaller household drain pipes, which handle wastewater from individual fixtures, the main sewer line is responsible for managing all of your home’s wastewater.

When this crucial pipe becomes clogged, it affects your entire plumbing system, often leading to multiple plumbing issues at once. Understanding the warning signs of a sewer line clog can help you take action before the problem escalates.

Common Signs of a Clogged Sewer Line

1. Slow Draining Fixtures Throughout the House

One of the earliest signs of a sewer line blockage is slow drainage in multiple fixtures. If just one drain (such as a bathroom sink) is draining slowly, the issue is likely localized to that particular drain. However, if multiple drains throughout your home are slow, it could indicate a blockage in your main sewer line.

2. Gurgling Noises from Drains or Toilets

If you hear gurgling noises coming from your drains, sinks, or toilets when using water, it’s often a sign of trapped air caused by a sewer line clog. These noises occur because the blockage prevents wastewater from flowing freely, forcing air bubbles back up through your pipes.

3. Frequent Toilet Backups

A clogged sewer line often results in recurring toilet backups, even after plunging. If your toilet frequently overflows or struggles to flush properly, it could be a sign that the blockage is deep in the sewer line.

4. Foul Odors Coming from Drains or Yard

Sewer gas has a distinct and unpleasant smell. If you notice a strong sewage odor coming from your drains or outside in your yard, it’s a major warning sign that your sewer line is clogged or leaking.

5. Water Backing Up in Other Drains

One of the clearest signs of a sewer line clog is when using one plumbing fixture causes water to back up elsewhere. For example, flushing the toilet might cause water to rise in the bathtub or shower. This happens because the clog is preventing proper drainage, forcing wastewater to move in unexpected directions.

6. Soggy or Sunken Yard Areas

If your sewer line is clogged or leaking, wastewater may seep into your yard, creating soggy or sunken areas. If you notice unexplained wet spots, unusually lush patches of grass, or foul-smelling puddles in your yard, a sewer line issue could be to blame.

7. Rodents or Insect Infestations

Sewer line issues can attract pests such as rats, cockroaches, and flies, which thrive in damp environments. If you notice an increase in pests around your home, it may be a sign that your sewer line is damaged or clogged.

What Causes Sewer Line Clogs?

Several common factors can contribute to a blocked sewer line, including:

  • Tree Root Infiltration: Tree roots are naturally drawn to moisture and can grow into sewer pipes, causing blockages and damage over time.
  • Grease, Fat, and Oil Buildup: Pouring grease down the drain may seem harmless, but over time, it can harden and create stubborn blockages.
  • Flushing Non-Flushable Items: Items like baby wipes, paper towels, feminine hygiene products, and cotton swabs do not break down properly and can easily clog sewer lines.
  • Collapsed or Broken Pipes: Older homes may have clay or cast iron pipes that deteriorate over time, leading to partial or complete blockages.
  • Foreign Objects: Items such as toys, jewelry, or excessive toilet paper can accidentally make their way into the sewer system, causing clogs.

How to Fix a Clogged Sewer Line

If you suspect a sewer line clog, it’s important to act quickly. Here are some methods to address the problem:

1. Use a Plumber’s Snake

A professional-grade plumbing snake can help break up minor obstructions. However, if the clog is deep in the sewer line, a plumber may need to use specialized equipment.

2. Hydro Jetting

Hydro jetting is a powerful method that uses high-pressure water to remove stubborn blockages, including tree roots and grease buildup, without damaging your pipes.

3. Sewer Camera Inspection

A licensed plumber can use a specialized camera to inspect your sewer line, pinpointing the exact location and cause of the clog. This is one of the most effective ways to diagnose sewer problems.

4. Sewer Line Repair or Replacement

If the clog is caused by broken or collapsed pipes, repairs or full sewer line replacement may be necessary. Trenchless sewer repair methods can minimize disruption to your property while restoring proper function.

Preventing Future Sewer Line Clogs

Preventing sewer line clogs is much easier (and cheaper) than dealing with a major blockage. Here are some proactive steps to keep your plumbing system running smoothly:

  • Dispose of grease properly—Never pour grease, fat, or oil down the drain. Instead, let it solidify and dispose of it in the trash.
  • Be mindful of what you flush—Only flush toilet paper; avoid wipes, paper towels, and hygiene products.
  • Use drain strainers—Install strainers in sinks and showers to catch hair, food particles, and other debris.
  • Schedule regular plumbing inspections—A professional plumber can catch small issues before they turn into costly repairs.
  • Keep trees away from sewer lines—If planting new trees, choose species with non-invasive roots and keep them at a safe distance from sewer lines.

When to Call a Professional Plumber

If you notice multiple signs of a sewer line clog—such as slow drains, gurgling toilets, or sewage smells—it’s time to call a professional. A licensed plumber can diagnose the problem and recommend the best solution before the issue leads to expensive repairs.

At Rocket Plumbing, we specialize in sewer line inspections, hydro jetting, and trenchless sewer repairs. If you suspect a clog in your sewer line, don’t wait—contact us today for fast, reliable plumbing services!

Need expert sewer line repair or maintenance? Call Rocket Plumbing today or visit RocketPlumb.com to schedule an appointment!

What to Do If Your Pilot Light Keeps Going Out

A pilot light that repeatedly goes out can be a frustrating and concerning issue for homeowners. Your water heater, furnace, or gas fireplace relies on a steady pilot light to function properly. If you’re experiencing this problem, it’s important to identify the cause and address it promptly to prevent further inconvenience or potential safety risks. In this blog, we’ll explore common reasons why your pilot light may be going out and what you can do to fix it.

Common Causes of a Pilot Light Going Out

  1. Dirty or Clogged Pilot Orifice Over time, dust, dirt, and debris can build up in the pilot orifice, restricting the gas flow. This can cause a weak or unstable flame that is more likely to go out. If this issue is not addressed, it can lead to inefficient heating and higher energy costs.
  2. Faulty Thermocouple The thermocouple is a safety device that detects whether the pilot light is on. If it senses that the flame is out, it shuts off the gas supply to prevent leaks. A malfunctioning thermocouple may incorrectly shut off the gas even when the pilot light is still lit. This could be due to a worn-out component, corrosion, or a misalignment issue.
  3. Drafts or Airflow Issues A strong draft or sudden gust of air can blow out the pilot light. Poor ventilation, an open window, or a nearby HVAC system could be creating airflow problems. Additionally, a faulty or loose vent cover can allow external air to disrupt the flame.
  4. Gas Supply Problems If the gas supply is interrupted or insufficient, the pilot light may struggle to stay lit. Low gas pressure, a closed or partially closed gas valve, or an issue with the gas line could be responsible. Sometimes, regional gas supply fluctuations can also contribute to this problem.
  5. Malfunctioning Gas Control Valve The gas control valve regulates the flow of gas to the pilot light. If this component is damaged or defective, it may not deliver enough gas to sustain the flame. Over time, wear and tear or debris buildup inside the valve can cause it to malfunction, requiring professional attention.
  6. Moisture Buildup In humid conditions, moisture buildup can interfere with the pilot light’s ability to stay lit. If condensation forms inside the appliance, it can extinguish the flame, particularly in water heaters located in damp basements or garages.

Steps to Fix a Pilot Light That Keeps Going Out

If your pilot light keeps going out, follow these troubleshooting steps:

  1. Turn Off the Gas Supply Before performing any maintenance, turn off the gas supply to your appliance. Locate the gas valve and switch it to the “off” position to prevent gas leaks.
  2. Clean the Pilot Orifice Use a thin wire, needle, or compressed air to carefully clear out any debris from the pilot orifice. This will help ensure proper gas flow and a stable flame. Regular cleaning can prevent future clogs and maintain efficiency.
  3. Inspect and Replace the Thermocouple If your thermocouple is faulty or misaligned, it may need to be cleaned, adjusted, or replaced. Make sure the tip of the thermocouple is properly positioned in the pilot flame. If replacing it, ensure you purchase the correct model for your specific appliance.
  4. Check for Drafts Identify any sources of drafts near the appliance and eliminate them. Close nearby windows and doors, and ensure that the pilot flame is protected from airflow disruptions. If necessary, install a draft shield or move the appliance to a less draft-prone area.
  5. Examine the Gas Supply Verify that the gas valve is fully open and that there are no interruptions in your gas supply. If you suspect a gas pressure issue, contact your utility provider or a professional plumber to assess and resolve the issue.
  6. Test the Gas Control Valve If all else fails, the gas control valve may need to be inspected or replaced. This is a job best handled by a licensed plumber or HVAC technician, as improper installation can pose safety risks.
  7. Address Moisture Issues If moisture buildup is extinguishing your pilot light, try running a dehumidifier in the area where the appliance is located. You can also insulate gas lines and the appliance itself to reduce condensation.

When to Call a Professional

While some pilot light issues can be resolved with basic troubleshooting, certain problems require professional expertise. If you notice any of the following, it’s best to call a licensed plumber:

  • A persistent gas smell, which could indicate a leak
  • Difficulty relighting the pilot light even after cleaning and maintenance
  • The flame is weak, flickering, or has an unusual color (e.g., yellow instead of blue)
  • Repeated pilot light failures despite troubleshooting efforts
  • Visible corrosion or damage to components such as the thermocouple or gas valve

At Rocket Plumbing, our experienced technicians can diagnose and repair pilot light issues quickly and safely. We have the tools and expertise to ensure your appliance is functioning properly and efficiently. If you’re dealing with a stubborn pilot light problem, don’t hesitate to contact us for professional assistance.

Preventative Maintenance Tips

To avoid future pilot light issues, consider the following maintenance tips:

  • Schedule annual inspections: Have a professional inspect and service your gas appliances at least once a year.
  • Keep the area clean: Dust and debris can accumulate around gas appliances, affecting airflow and operation.
  • Check gas connections regularly: Ensure gas valves and lines are in good condition to prevent leaks.
  • Monitor flame color: A healthy pilot light flame should be blue. If it turns yellow or orange, it may indicate a problem with gas combustion.

Final Thoughts

A pilot light that won’t stay lit can be a nuisance, but with the right troubleshooting steps, you can often resolve the issue yourself. However, for persistent or complex problems, it’s best to seek professional help. Keeping your gas appliances in good working condition ensures efficiency, safety, and peace of mind.

Need help with your pilot light? Contact Rocket Plumbing today for expert plumbing solutions! Our team is here to assist you with all your plumbing and gas appliance needs, ensuring a safe and comfortable home environment.

How to Inspect and Know If Your Sump Pump Is Failing

A sump pump is an essential component of your home’s flood prevention system, designed to remove excess water from your basement or crawlspace and prevent costly water damage. However, like any mechanical device, sump pumps are not immune to wear and tear. Over time, they can malfunction or fail, leaving your home vulnerable to flooding, structural damage, and mold growth.

According to the Insurance Information Institute, water damage accounts for nearly 29% of all homeowners’ insurance claims in the United States, with the average claim amounting to $11,650. A failed sump pump is a common cause of water damage, especially during heavy rainfall or rapid snowmelt.

Recognizing the warning signs of a failing sump pump, performing routine inspections, and taking preventive measures can help you avoid unexpected failures. This guide will walk you through the key indicators of sump pump failure, inspection methods, and maintenance strategies to ensure your sump pump remains in optimal working condition.

Common Signs That Your Sump Pump Is Failing

Unusual Noises During Operation

A properly functioning sump pump should operate quietly, with only a soft humming sound. Any unusual noises may indicate a mechanical problem. A loud grinding or rattling sound, for example, could be a sign that the impeller—a fan-like component that helps move water—is damaged or clogged with debris. A persistent humming noise without any water movement might mean the pump is running but not effectively displacing water, possibly due to a blockage or an electrical issue.

Additionally, gurgling sounds coming from the discharge pipe can be a sign that air is trapped in the system, which could be caused by a missing or malfunctioning check valve. Addressing these noises early can prevent further damage to your pump and keep it running efficiently.

Frequent or Continuous Operation

Your sump pump should not be running continuously unless there is a prolonged period of heavy rain or an exceptionally high water table. If your pump runs constantly, it may indicate an issue such as a stuck float switch, a faulty check valve, or an undersized pump struggling to keep up with the volume of water.

A stuck float switch is one of the most common causes of this issue. The float switch is responsible for activating the pump when water levels rise. If it gets stuck in the “on” position, the pump will run indefinitely, causing unnecessary wear and shortening its lifespan. Similarly, a failing check valve can lead to water flowing back into the sump pit, causing the pump to repeatedly turn on.

Excessive Vibrations

If your sump pump vibrates excessively during operation, it may be due to an imbalanced or damaged impeller. The impeller can become bent or cracked if debris is sucked into the pump, leading to increased wear on the motor and reducing the overall efficiency of the system. Unlike some other parts of the pump, a damaged impeller usually cannot be repaired and requires a full pump replacement.

Ignoring excessive vibrations can cause further internal damage, leading to complete sump pump failure. Regularly inspecting and cleaning the sump pit can prevent debris from reaching the impeller and help extend the pump’s lifespan.

Advanced Age of the Pump

Sump pumps typically last between seven and ten years, depending on their frequency of use and the conditions they operate under. If your sump pump is approaching or exceeding this age range, it is wise to consider replacing it before it fails unexpectedly.

Older sump pumps are more prone to mechanical failure and may not function efficiently when you need them the most. Routine maintenance can extend the life of your pump, but if you notice persistent issues, investing in a new, high-quality sump pump can save you from costly water damage repairs in the future.

Visible Rust or Corrosion

Rust on the sump pump or its discharge pipe is another warning sign that should not be ignored. Corrosion can weaken the pump’s components and reduce its effectiveness. In some cases, rust can be caused by iron bacteria, which create a thick, gelatinous sludge that clogs the pump and discharge lines.

Iron bacteria buildup can significantly impact the efficiency of your sump pump, preventing it from properly draining water. If you notice any signs of rust or sludge accumulation, have a professional inspect the system to determine whether cleaning or replacement is necessary.

Water in the Basement Despite the Pump Running

One of the most obvious indicators of a failing sump pump is standing water in your basement, even when the pump appears to be running. This could be caused by a clogged or frozen discharge pipe, a malfunctioning check valve, or a pump that has lost its suction power.

If the discharge pipe is blocked, water cannot be expelled from the sump pit, causing flooding. Similarly, a faulty check valve can allow water to flow back into the pit, forcing the pump to work harder and increasing the risk of failure. Regular inspections can help identify and resolve these issues before they cause major water damage.

How to Inspect Your Sump Pump

Testing the Pump with Water

One of the easiest ways to check if your sump pump is functioning correctly is by performing a simple water test. Fill a bucket with five gallons of water and pour it slowly into the sump pit. The pump should activate automatically once the water reaches a certain level and remove the water within ten to twenty seconds. If the pump fails to turn on or is slow to drain the water, there may be an issue that requires further investigation.

Checking the Float Switch

The float switch is a crucial component of your sump pump, as it signals when the pump should activate. Ensure that the switch moves freely and is not obstructed by debris or tangled wires. A stuck float switch can prevent the pump from turning on when needed or cause it to run continuously, both of which can lead to serious problems.

Inspecting the Discharge Pipe and Check Valve

The discharge pipe is responsible for directing water away from your home. A clogged, frozen, or damaged pipe can prevent the sump pump from effectively expelling water. Inspect the pipe for any blockages, and ensure that it extends far enough from your foundation to prevent water from seeping back into your basement.

Additionally, check the condition of the check valve, which prevents water from flowing back into the sump pit. If the check valve is malfunctioning, replacing it can improve the efficiency of your sump pump and prevent unnecessary wear.

Verifying the Backup Power Source

Since power outages often accompany severe storms, it is crucial to have a backup power source for your sump pump. More than 60% of sump pump failures occur due to power loss during heavy rainstorms. Installing a battery backup or generator can ensure that your pump continues to function even when the electricity is out.

Preventative Maintenance Tips

  • Clean the Sump Pit Regularly – Removing debris, dirt, and other obstructions can prevent clogs and prolong the pump’s lifespan.
  • Replace the Pump Every 7–10 Years – Even if the pump appears to be working, replacing it before failure occurs can prevent costly damage.
  • Install a Water Alarm – A high-water alarm can alert you to potential pump failures before they lead to flooding.
  • Perform Biannual Maintenance Checks – Test your sump pump in the spring and fall to ensure it is ready for heavy rain seasons.

When to Call a Professional

If you notice persistent issues with your sump pump, it is best to consult a professional plumber to diagnose and resolve the problem. A sump pump failure can lead to extensive water damage, mold growth, and structural issues if not addressed promptly.

At Rocket Plumbing, we specialize in sump pump inspections, repairs, and replacements. Our team of experienced professionals can assess your system and provide expert recommendations to keep your home protected from water damage.

For professional sump pump services, contact us today.

Signs Your Water Heater Needs Repair or Replacement

Hot water is a necessity in every home, providing comfort for showers, cleaning, and everyday household tasks. When your water heater starts to fail, it can lead to inconsistent temperatures, high energy bills, and even potential water damage. Knowing the warning signs can help you avoid a sudden breakdown and costly emergency repairs.

At Rocket Plumbing, we specialize in water heater repair and replacement, ensuring you always have access to reliable hot water. If you’ve noticed any of the following issues, it may be time to schedule a professional inspection.

1. Inconsistent Water Temperature

One of the most common signs of a failing water heater is fluctuating water temperatures. If you’re experiencing:

  • Water that turns cold unexpectedly
  • Hot water running out faster than usual
  • Difficulty maintaining a consistent temperature

Your water heater could have a malfunctioning thermostat, sediment buildup, or failing heating elements. A professional inspection can determine whether a repair will fix the issue or if replacement is the better option.

2. Strange Noises Coming from the Tank

A properly functioning water heater should operate quietly. However, if you hear:

  • Rumbling, popping, or banging sounds
  • Hissing noises coming from the unit
  • Loud knocking or clanking when heating water

These sounds often indicate sediment buildup at the bottom of the tank. Over time, mineral deposits from hard water settle in the tank, reducing efficiency and causing overheating. A tank flush or full replacement may be necessary, depending on the severity of the issue.

3. Discolored or Rusty Water

If your hot water appears brown, rusty, or has an odd smell, it could be a sign of:

  • Corrosion inside the tank
  • Rusty or deteriorating pipes
  • Bacteria growth in the tank

While minor discoloration may be resolved by flushing the tank, severe corrosion inside the water heater usually means it’s time for a replacement. Ignoring this issue could lead to leaks and water damage in your home.

4. Water Leaks Around the Heater

Any sign of water pooling around your water heater should never be ignored. Leaks can occur due to:

  • Cracks or corrosion in the tank
  • Loose or faulty pipe connections
  • A leaking pressure relief valve

Small leaks can quickly turn into major water damage if left unaddressed. If you notice moisture around the base of your water heater, call Rocket Plumbing immediately for an inspection.

5. Decreased Hot Water Supply

Does your hot water run out much faster than it used to? If your water heater isn’t producing enough hot water, the cause could be:

  • Sediment buildup reducing the tank’s capacity
  • A failing heating element or burner
  • A water heater that’s too small for your household needs

If your current unit can’t keep up with demand, you may need a larger-capacity water heater or an upgrade to a tankless system.

6. High Energy Bills

An inefficient water heater can significantly increase your energy costs. If your utility bills are rising but your hot water usage remains the same, your water heater may be working harder than necessary due to:

  • Sediment buildup forcing the unit to use more energy
  • A failing heating element
  • An outdated, inefficient model

Replacing your old unit with a modern, energy-efficient water heater can lower your utility bills and improve overall performance.

7. Your Water Heater Is Over 10 Years Old

The average lifespan of a traditional tank water heater is 8–12 years, while tankless models can last up to 20 years with proper maintenance. If your unit is approaching or exceeding its lifespan, consider a replacement before it fails unexpectedly.

Check the age of your water heater by looking at the manufacturer’s label or serial number. If it’s more than a decade old, it may be time for an upgrade.

Repair or Replace? How to Decide

If your water heater is showing any of the above signs, you may be wondering whether a repair or full replacement is the best option. Here’s a general guideline:

Consider Repairing If:

  • The unit is less than 8 years old
  • The issue is minor, like a faulty thermostat or heating element
  • The tank isn’t leaking and has no major rust or corrosion

Consider Replacing If:

  • The unit is 10+ years old
  • There are multiple ongoing issues requiring frequent repairs
  • The water heater is inefficient and driving up energy costs
  • The tank is leaking or showing signs of corrosion

Rocket Plumbing can help you determine the best course of action based on your specific situation.

Upgrade to a More Efficient Water Heater

If it’s time for a replacement, consider upgrading to a high-efficiency model. Options include:

  • Traditional Tank Water Heaters – Ideal for larger households needing a steady supply of hot water
  • Tankless Water Heaters – Provides on-demand hot water, reduces energy costs, and takes up less space
  • Hybrid Water Heaters – Uses heat pump technology for maximum energy efficiency

Our experts at Rocket Plumbing can help you choose the best water heater for your home and provide professional installation services.

Schedule Your Water Heater Inspection Today

Don’t wait until your water heater fails completely—address issues early to avoid unexpected breakdowns, costly repairs, and water damage.

At Rocket Plumbing, we provide fast, reliable, and expert water heater repair and replacement services. Our licensed professionals will inspect your unit, offer honest recommendations, and ensure your home has a dependable hot water supply.

Contact Rocket Plumbing today or schedule a service online. Let us help you keep your hot water flowing!

Preventing Sewer Line Backups: Essential Tips for Homeowners

A sewer line backup is every homeowner’s nightmare. Not only can it cause costly damage to your property, but it also brings unpleasant odors, slow drains, and potential health hazards. Fortunately, with proper maintenance and preventative measures, you can avoid these messy situations and keep your home’s plumbing system running smoothly.

At Rocket Plumbing, we specialize in sewer line maintenance and repairs, helping homeowners prevent backups before they become disasters. In this guide, we’ll share expert tips to protect your sewer lines and keep your plumbing trouble-free.

Understanding Sewer Line Backups

Your home’s main sewer line is responsible for carrying wastewater from your sinks, toilets, and drains to the municipal sewer system or septic tank. When this line gets clogged or blocked, wastewater has nowhere to go—leading to a backup that can cause significant property damage.

Common Causes of Sewer Line Backups

  • Tree root intrusion – Tree roots naturally seek out moisture and can invade sewer lines, causing cracks, blockages, or even complete pipe collapses.
  • Grease and fat buildup – Pouring cooking grease, fats, and oils down the drain can lead to buildup over time, restricting water flow.
  • Flushing non-flushable items – Paper towels, wipes (even “flushable” ones), hygiene products, and other debris don’t break down properly and can create stubborn clogs.
  • Aging or damaged pipes – Older homes with clay or cast iron pipes are prone to corrosion, cracking, and collapsing, leading to backups.
  • Heavy rain or flooding – Excessive rainfall can overwhelm municipal sewer systems, pushing sewage back into residential lines.

Top Tips to Prevent Sewer Line Backups

Be Mindful of What You Flush and Pour Down the Drain

One of the easiest ways to prevent clogs in your sewer line is to be cautious about what goes down your drains and toilets.

Do NOT flush:

  • Baby wipes (even flushable ones)
  • Paper towels
  • Feminine hygiene products
  • Cotton balls, swabs, or floss
  • Diapers

Do NOT pour down the drain:

  • Cooking grease or oil
  • Coffee grounds
  • Eggshells
  • Pasta, rice, or fibrous vegetables (celery, potato peels)

Instead, dispose of grease and food waste in the trash, and consider installing a garbage disposal with regular maintenance to break down small food particles.

Schedule Routine Sewer Line Inspections

A professional plumbing inspection can detect small issues before they turn into major problems. At Rocket Plumbing, we use video camera inspections to check for cracks, blockages, and tree root intrusion inside sewer pipes.

Recommended frequency:

  • Older homes (40+ years old) – Inspect every 1-2 years
  • Newer homes – Inspect every 2-3 years
  • After major plumbing issues – Inspect immediately

Install a Backwater Valve

A backwater valve is a device installed in the sewer line that prevents wastewater from flowing back into your home during heavy rains or municipal sewer system overloads. If you live in an area prone to flooding, this extra layer of protection is a smart investment.

Keep Trees and Shrubs Away from Sewer Lines

If you have trees growing near your sewer lines, their roots can penetrate pipes, causing cracks and severe blockages.

  • Avoid planting trees near sewer lines (oak, willow, and maple trees have aggressive roots).
  • Install root barriers to redirect root growth away from pipes.
  • Use root-killing treatments if tree roots are a known issue (consult a professional before use).

Clean Your Drains and Sewer Line Regularly

Periodic cleaning helps remove debris before it becomes a problem. You can:

  • Flush drains with hot water weekly to break up grease and soap scum.
  • Use enzyme-based drain cleaners monthly (avoid harsh chemical cleaners that can damage pipes).
  • Schedule professional hydro jetting every few years to clear stubborn debris and root growth.

Replace Old or Damaged Sewer Pipes

If your home has clay, cast iron, or Orangeburg pipes, they are prone to cracks, deterioration, and root intrusion. If you experience recurring backups or slow drains, consider replacing your sewer line with durable PVC or HDPE pipes, which resist corrosion and root infiltration.

Know Where Your Sewer Cleanout is Located

A sewer cleanout is an access point that allows plumbers to clear blockages in your main sewer line. Knowing its location can save time and money in case of an emergency. If your home doesn’t have one, installing a cleanout can make future maintenance easier.

What to Do if You Experience a Sewer Line Backup

Even with proper maintenance, sewer line issues can still occur. If you notice:

  • Multiple drains backing up at once
  • Gurgling noises from toilets or drains
  • Foul sewage odors inside your home
  • Slow draining sinks, tubs, or showers

Take these immediate steps:

  1. Stop using all water fixtures – Avoid flushing toilets or running water to prevent further backup.
  2. Check your sewer cleanout – If water is standing in the cleanout, you may have a blockage.
  3. Call Rocket Plumbing Immediately – Our team offers 24/7 emergency sewer line services to diagnose and resolve the issue quickly.

Protect Your Home from Sewer Line Backups – Call Rocket Plumbing Today!

Don’t wait until a small clog turns into a costly sewer backup. With routine maintenance, smart prevention, and professional inspections, you can keep your sewer system flowing smoothly.

At Rocket Plumbing, we specialize in sewer line inspections, repairs, and replacements to keep your plumbing in top shape. Whether you need routine maintenance, hydro jetting, or a full sewer line replacement, we’ve got you covered.

Contact Rocket Plumbing today to schedule a sewer line inspection or service!